Showing posts with label Christmas. Show all posts

Friday, December 15, 2023

Ginger Pocket Peeker

Happy Friday Friends!  

Kris here with you today, sharing a cute Christmas card featuring our Christmas Release!  All the dies in this release are 30% off for a limited time, so a great time to pick some up for those last minute holiday cards for this year OR to get a head start on next year's cards! 


Today I'm showcasing the Ginger Pocket Peeker from our Christmas 2023 Release, and the fun Trellis Background Die from our Black Friday Release!  

It's so easy to create fun plaid backgrounds with this Trellis background die! Marla shared in her latest video HERE how you can layer the die by cutting 2 and turning one upside down!  Easy peasy!!  

CUTTING & SCORING:

Red cardstock:
A2 top folding card

Teal Green cardstock:  

White cardstock:
 2nd largest Scalloped Rectangle

Teal patterned paper with white snowflakes:
3rd largest Stitched Rectangle


DESIGN STEPS:

1.  I layered the white Trellis onto the Green so that they are opposite (one upside down), glued them together and then onto my card front.  **Thanks again for that awesome tip Marla ☺

2.  I glued my patterned paper onto my white scalloped layer, then added foam tape to the back to pop it up a bit to center of my card. 


3.  Next, I stamped a denim background stamp onto my top and bottom layers of my pocket and glued them on. 


4.  I colored my die cuts and assembled.


5.  I added all my elements to the front with 2x the foam tape.  I then added some Snow Writer to the Hat trim and puff for lots of dimension.  I finished it off with a tiny snowflake in the middle of my peppermint and 4 green gems in the corners.  


Such a cute and quick card to make!  

I hope you enjoyed this tutorial ☺ 
 Thanks for visiting!


~Kristine

Friday, December 08, 2023

Holiday Lantern Tea Light Décor


Happy Friday Crafties!

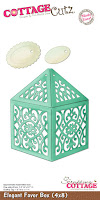
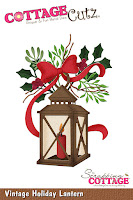
Kris here today sharing a home décor item for the holidays!  This can also be a cute li'l gift box by adding some printed tissue paper to hide the gift or gift card etc.  I was inspired by the new Vintage Holiday Lantern die (from the 2023 Christmas Release) to turn this Elegant Favor Box into a lantern using a battery operated tea light candle.  


How I made it:

I die cut (4) of the Elegant Favor Box die from one 12" x 12" piece of textured black cardstock.


As you can see, it also adds score lines where you need to fold ~ so I folded all of them inward.  


I glued 3 of the vertical side flaps together.  Then at the top, I glued only the tiny tabs to the larger tab of the next piece as shown below. 

*Do not glue the larger flaps together as you won't be able to get your hand in to pull out the contents. 😏 


Then I glued the final connecting side flap.  (You could do this before you glue the top tiny flaps.)


For the bottom, I folded the flaps in so that the 90 degree angled corners are hidden by overlapping the next one and so forth, and the last one tucks under the first flap.  Add glue to secure if you wish.


Next, I die cut my decorative elements -- the foliage from the Vintage Holiday Lantern die --from green, gold and red.  I also foiled a sentiment for my tag.


I placed a small battery operated tea light in the bottom of my lantern and added some fake greenery around it.

Next, I took some black/white gingham ribbon and cut the end at a deep angle so I can run it through the holes at the top to close it.  


This step took me a couple of times, but what worked best for me was to start from the outside and go into the first hole, come back out of the 2nd one, into the next and out of the last.  This way you end up with both strands coming out so you can tie a nice bow.


I glued my greenery to the back of my tag/sentiment piece, steering clear of the hole in the tag.

Then I tied my bow, adding my tag just before I made the loops of my bow.  ((yes, the tea light is on the outside of my lantern just because I wanted to show y'all what I used))


And ta-da!!  Super easy... yet elegant and festive décor for the holidays!  

*oops, just realized after seeing my photos that I forgot to add the gold jellyroll accents to my berries!  Let's just pretend there's gold accents there 😁


I hope I've inspired you in some way to get crafty with your favorite CottageCutz dies this week!  

Ink Something Crafty!
♡  ♡  ♡
~Kristine


Friday, November 17, 2023

Space Rocket Santa Slider

Happy Friday friends! 

Kris here, share with you a slimline slider card featuring the Santa Space Rocket die.  And just a li'l reminder that all of the individual dies in our Christmas 2023 Release are 30% off for a limited time!  


Pull the slider to reveal an embossed message from Santa


DESIGN STEPS:

• Start with a light teal top folding card base cut at 9" x 8" and scored in half at 4".  

• Cut a darker teal mat at 8-3/4" x 3-3/4" and adhere to card front. 

• Using the largest of the Pinking Sheer Edge Slimline dies, cut (1) from dark teal and another from a snowflake design paper.  

  --Die cut trees from the Mountains & Trees Slimline die towards the bottom of the teal layer.  (Save the top portion for another project).  Add Snow Writer (puffy snow) to the trees and set aside to dry. 

  -- From the Snowflake layer,  figure out where you want your slider channel to be and die cut the smallest of the Nested Rectangle Slimline set. (You could also use the smallest from the Rounded Rectangle Slimline set if you have that!)   Die cut the end of the die from the short edge in line with your long cut out section as shown below. 

• Cut from thick white cardstock a slider tab that is 3/4" x 8".  Cut the same from Snowflake pattern paper and adhere on top.  

  --I used a tab punch to cut the end of the tab *optional

• Cut a stabilizer piece from white c.s. at 2-3/4" x 1/2" and loosely wrap around the tab as shown.  

• Lay your snowflake patterned paper onto card front and stamp your sentiment in VersaMark in the window and heat emboss with white e.p. 


• On the back of your snowflake layer, place tab towards edge where the opening is and glue the stabilizer down between the open edge and the slimline opening.  Add 1/8" foam strips very close around the pull tab.  

 --I also angled the other end of my tab to follow the tail of my rocket so that part of the slider wasn't showing.  *optional.


• Remove tape backing and adhere to card front.


• Die cut Santa Space Rocket from white c.s., color and assemble. 


• Place rocket towards right edge of card and glue a dimensional or slider disc to the pull tab right under the middle of the rocket.


• Die cut Merry Christmas w/ Friends ... add color or shading... adhere to card front.  


DONE!


~Kristine

Monday, September 25, 2023

Holiday Deer

Happy Monday crafty friends!

Kris here to share some rustic Christmas inspiration with you☺  

I made this Christmas card using the new Holiday Deer die from the 2023 CHRISTMAS RELEASE!  


There are 2 brand new releases in store --- one is Christmas (40 designs)  and the other is Fall (15 designs) --- they are AMAZING --- and the best news, you can get them ALL in the bundles for 50% off!!   But this offer is for a limited time.  If you prefer to pick and choose your favorites, the individual dies in each release are 30% off!  

CUTTING & SCORING:

• Card Base:  (Red) Cut 10" x 7" and score the 10" side at 5"
• (Sand) Cut 4-3/4" x 6-3/4" - embossed with a diamond folder
• (Pecan Pie) Die cut w/ largest Scallop Square
• (Red/Blk Buffalo Check) Die cut w/ smallest Pierced Square and Merry Christmas w/ Friends
• (White) Die cut Holiday Deer and the holly/berries from Ginger Pocket Peeker


DESIGN STEPS:

I layered the Sand/embossed layer onto card front, then I layered the squares and attached to top middle of card.

I used Distress Oxide inks and Copic markers to color up my Holiday Deer and holly berries.  


I forgot (as I often do) to use double sided adhesive sheet to the back of my buffalo check paper before I die cut my sentiment, so... the next best thing!!  I turned it upside down on the sticky side of some low-tac tape, added my glue to sentiment, then I turned it over and used my lamp light to see exactly where to place the sentiment and Wha-La!  Got it on there fairly straight ... and then removed the low-tac tape.  


I added the holly/berries to help fill some empty space around sentiment and done!  ☺


❀ Ink Something Crafty ❀
~Kristine