Showing posts with label cottagecutz fancy heart. Show all posts

Wednesday, December 27, 2023

Time for Valentines

 Hello Friends 

I hope you all had a blessed time with family and friends this past Christmas. And I would like to wish you all a very Happy New Year.  We are running an after Christmas Sale in the online store right now.  So use your Christmas money and save big! Click here to see what great values we have.

I am getting a jump start on my Valentines.  I am using the Garden Butterflies and Bee die from our Black Friday release for this fun little block card.


Design Steps: (Here is a link to a video that I used to make the base https://www.pinterest.com/pin/443534263317816376/ )

1.  Start with a piece of white card stock measuring 10 x 6 3/4.  Score at 3, 4 1/2, 6, 7 1/2
2.   Fold the flap back along the 6 inch score. Place a ruler at the bottom along the fold and use a pencil to mark small dots at 1/2, 1 3/4, 2, 3 1/4, 3 1/2, 4 3/4, 5, 6 1/2
3.  Place your card into a paper cutter and cut from the dots to the closest score line as shown above
4.  When you have completed the cuts fold as shown below

5. Using the Honeycomb Background Slimline cut 2 pieces in white: 6 1/2 x 2 3/4 and 6 1/2 x 2 1/4.  Using a blending brush and a pink ink to add some color to both pieces.
6.   Using the same pink ink place some of the ink onto a acrylic block and then add a little water.  Pick up the ink with a brush.  Hold the brush over the place you want splattered and gently tap the brush with your finger
7.  Cut 6 pieces of pink card stock 1 1/4 x 1.  Glue the pink rectangles to the card as shown above
8.  Using the following dies and card stock colors: Garden Butterflies and Bee black and yellow,  Fancy Heart pink, Be My Valentine Puppies red glitter card stock and Stitched Alphabet black
9.  Arrange your pieces as shown above and add a few silver sequins and your card is complete


We have more inspiration on our YouTube Channel check it out HERE

Thanks so much for stopping by!  And I will see you next Thursday.

Blessings and Take Care


Thursday, January 03, 2019

Penguin Love!

Good Morning!

It is Pam on the blog with you today!

Happy 2019 to you! I hope your new year is filled with happiness, joy and lots of crafty fun!  And before I get to my project I wanted you to know we are having a fabulous sale in our store.  So make sure you check it out especially if you got some Christmas cash!  On to today's card I am continuing to make my Valentines.  I am using the Christmas release Hugging Penguins!

Designer Steps:
 1.  Cut out the penguin using the Hugging Penguins die.  I used black and white card stock for the penguin body and red for the heart which I cut out with Fancy Heart die
 2.  Color the feet and the beck with your favorite markers
 3.  Shade the white part of the bodies with grey markers.  Assemble the penguin and add a small black rhinestone for the eye
 4.  Use an A2 black card base cut a piece of DP slightly smaller then the card base.  Use the Pierced Rectangle Frame die to cut out the frame then edge with black
5.  Glue the frame to the DP add a ribbon and then glue to the card front.  Use the Mr. & Mrs. with Hearts die and cut out the small red hearts.  Stamp the large heart with I love you.  Pop up the penguins and heart then glue the smaller hearts to the corners of the frame
CottageCutz Products


Blessings
Pam


Sunday, January 22, 2017

Happy Valentine's Day

Hello everyone!

It's Donna here, can you believe we are almost at the end of January......here in Virginia, we have not gotten any snow and it has been relatively warm for this area.  I am enjoying it while it last, because we still have February to go.

I am here sharing another Valentine card.  I know I have told you before, but I love the colors of Valentine's, I love red and pink with black.  Today, I am sharing with you a red and black card.  There are several newly released Valentine dies that you just have to see. Go over to the CottageCutz store and check them out.  Right now the Valentine release is 25% off!

I am using the new CottageCutz Fancy Heart and the Valentine's Day Phase on my card. These sets are adorable and so easy to assemble. See below on how I put my card together.
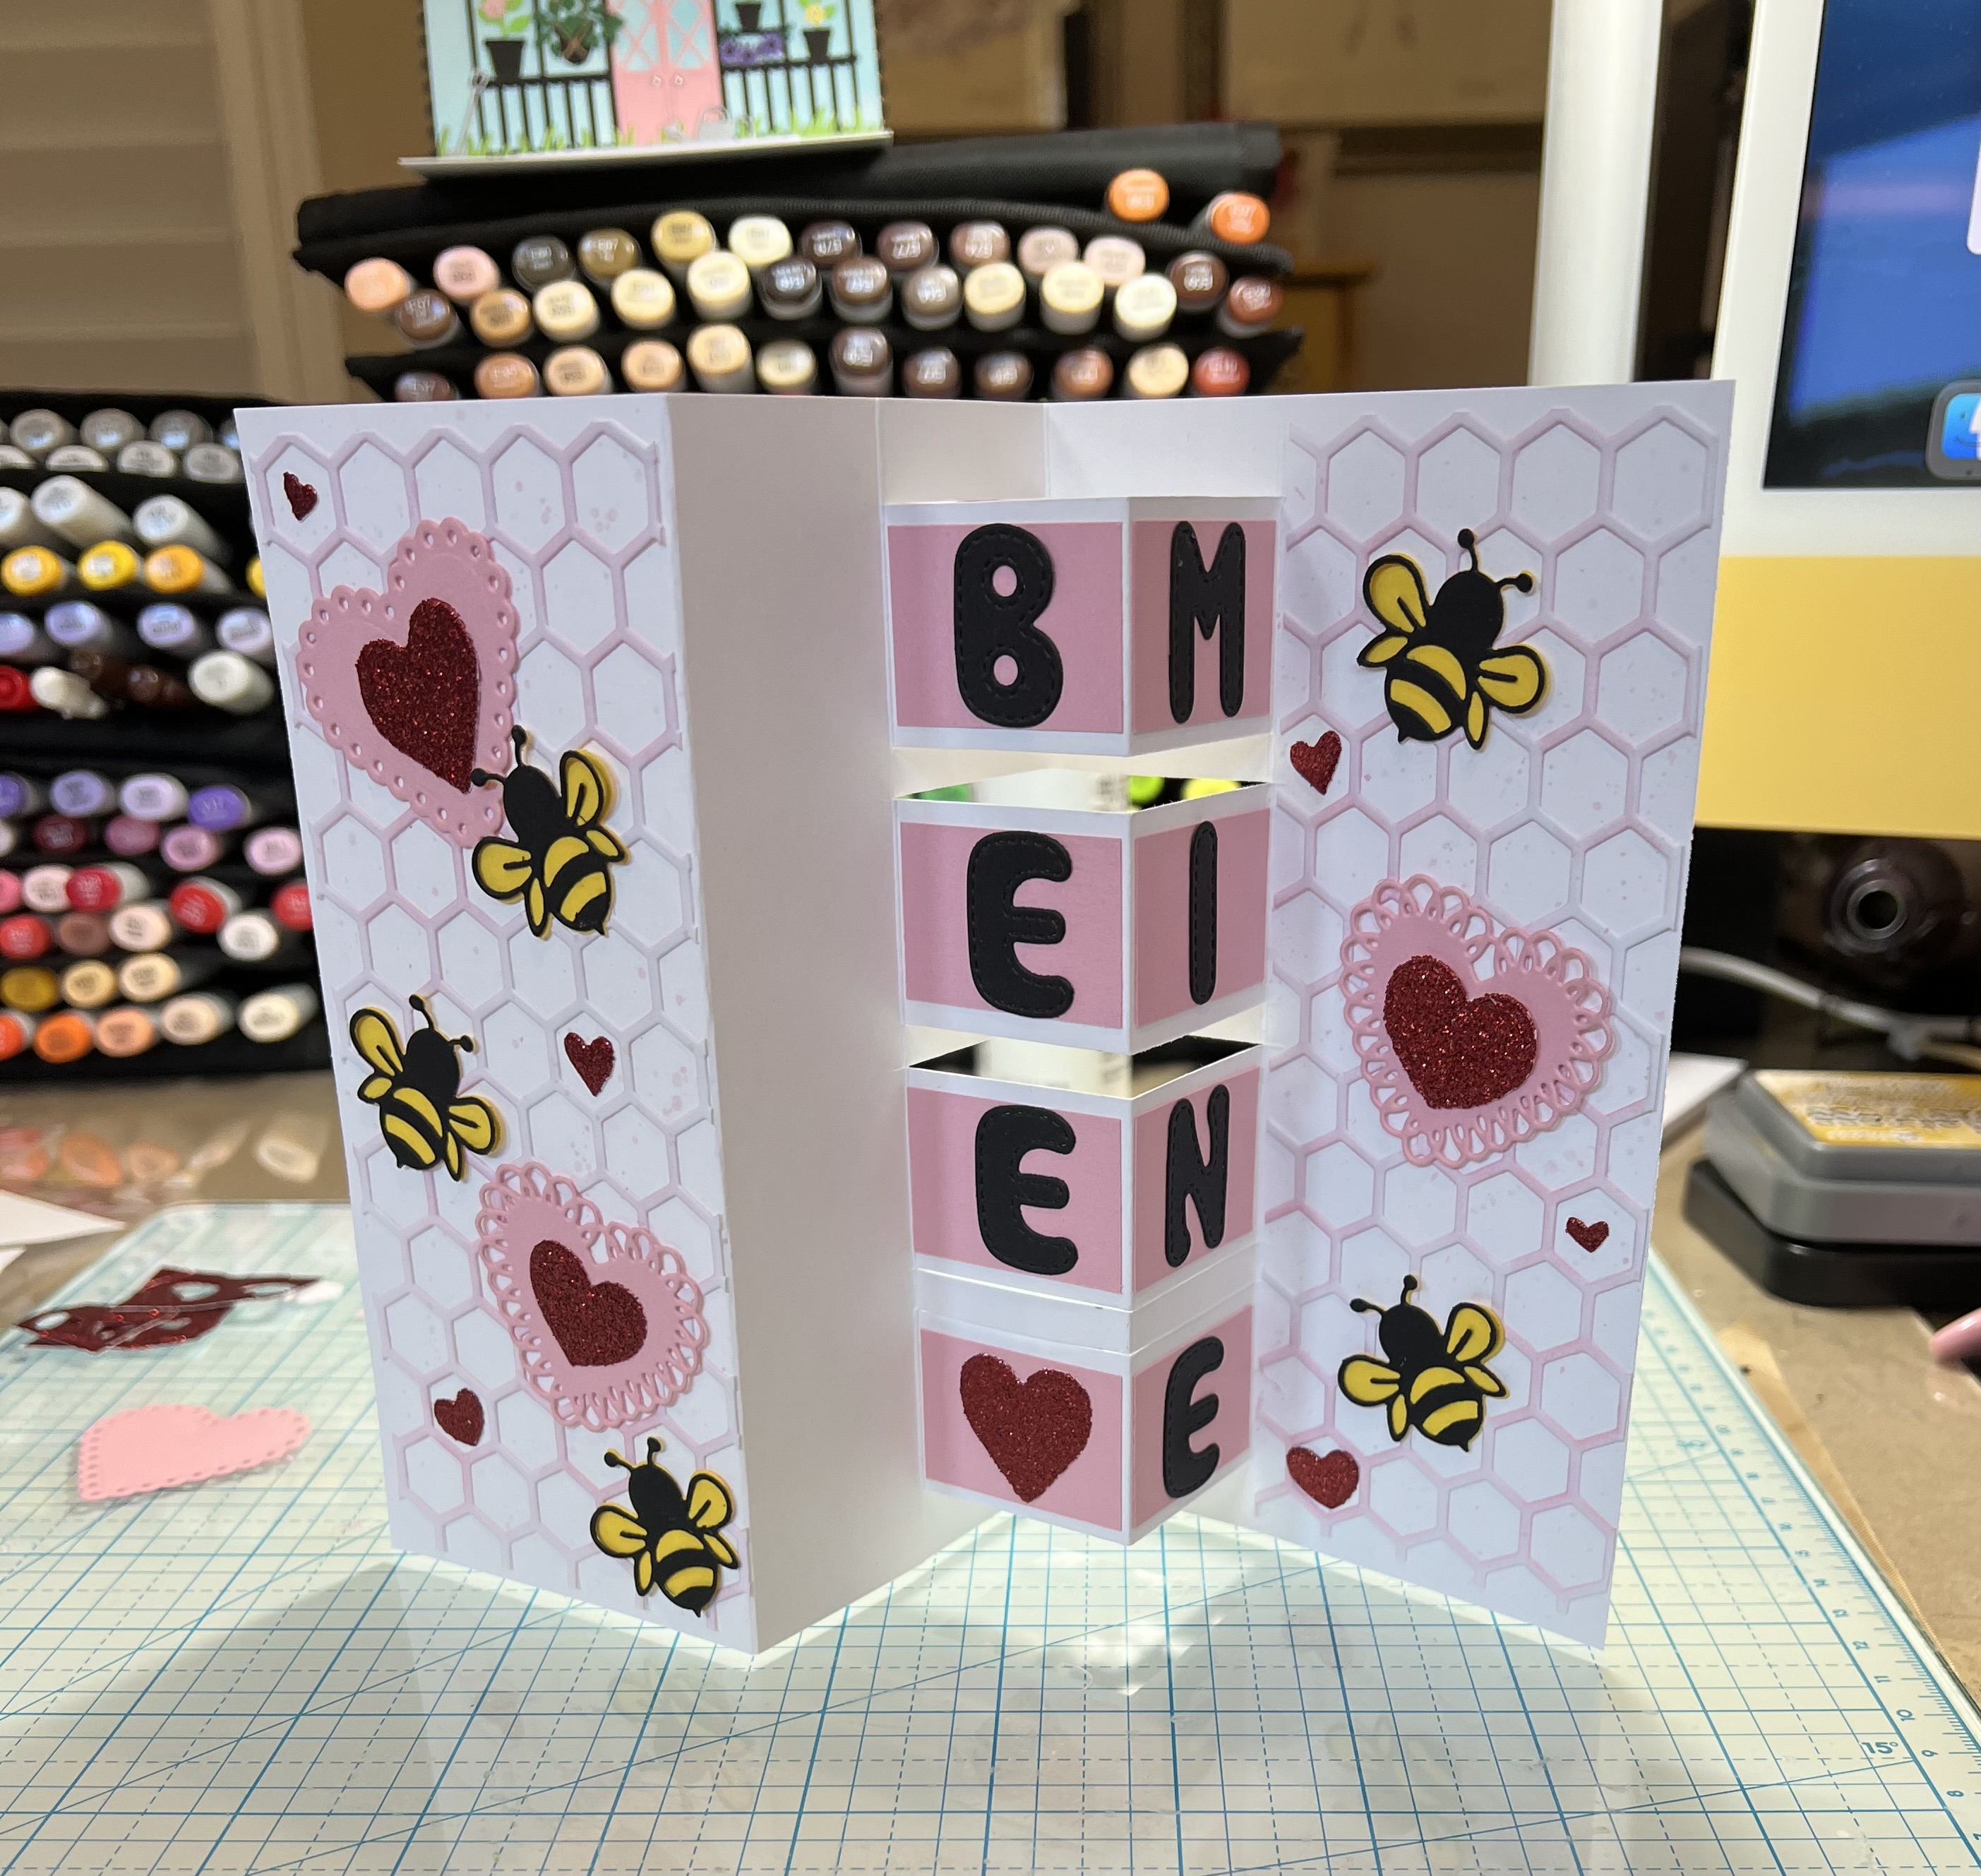

Closer look:

inside of the card:

Here is how I put my card together:

1.  My card is an A2 card (4 1/4 x 5 1/2).  I cut a layer (red), which measures 4 x 5 1/4.  I die cut all the pieces I need for my card. 


2.  I wanted to create a frame in the front of my card, so I took the fourth circle to the largest from the CottageCutz Circle Set, found the center of the card.  I used some re-positional tape to keep the circle from slipping.  

3.  After I die cut the circle, I took the red layer from my card and die cut another circle using the third to the largest circle.  I die cut the circle, embossed it and adhered the layer onto the black card.


4.  I cut out two of the "Fancy Hearts", I used some foam tap and put the two hearts together.  This would give the heart more dimension.

5.  I have a little trick for all those intricate dies.  The "Valentine Phrase" die is some intricate and dainty, I took some double stick tape and put it on the back of the black piece that I was cutting the sentiment out of.  I laid my die on the top of the black piece and ran it through my die cutting machine.


6.  When I took the paper away from the die, this is what it looks like, the adhesive is already onto the words.  I added this onto my card and finished it off by adding some sequins.


 Dies Used: