Thursday, June 24, 2010

Go Fish

Happy Thursday Everyone!

These are the CottageCutz dies I am showcasing today.


For my layout I wanted to show you some good examples of cutting different materials with your CottageCutz dies. I used cork, chipboard and thin metal on this layout. For more info on cutting different materials with your CottageCutz dies, check out my 6/9/10 WFIW post.


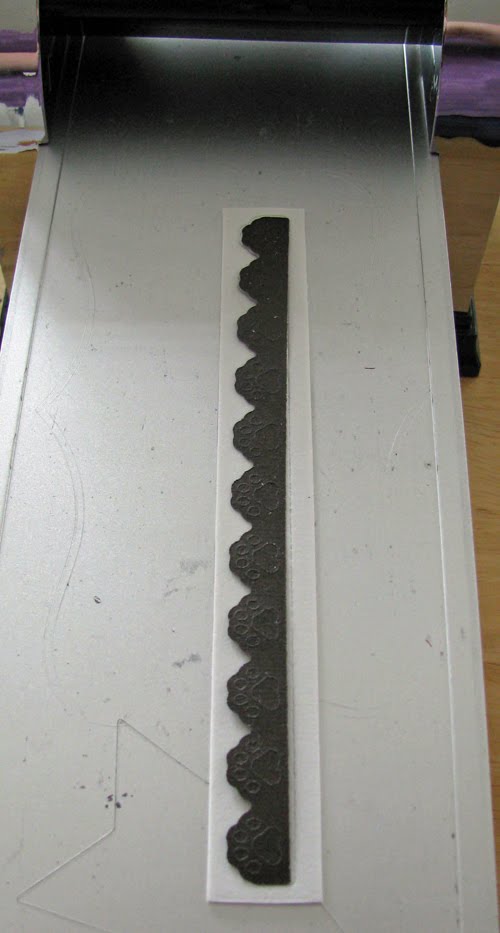
Here is a close-up of my CottageCutz Fish. I first cut the fish out of chipboard and then thin metal, adhered them together to give some dimension on my layout. With the CottageCutz Edger I used cork to add some texture.


Here is a close-up of the CottageCutz Fishing Pole. I first cut the pole out of chipboard and then thin metal and cardstock, adhered them together for some dimension. I added some sewing thread for the finishing touch. For the lures I used cardstock and thin metal.


I really hope you will try cutting your CottageCutz dies with some different materials, it really adds that extra something to your layout.

Have a blessed day!
Karen

Wednesday, June 23, 2010

Watch for it Wednesday #66

Today I want to show you some fun things you can do with your CottageCutz dies.
I simply ran some white paper through my cutter with the Daisy die and then punched out just the one daisy so I could use it for a stencil.
Of course this cuts out everything on the die but you don't need to punch it all out, just the one you want to use for a stencil. Then I used some ink and a dauber to sponge the flower onto my paper.
I did the same with the Flower 3, Layered die and just used the stem.
Another fun way to use your dies is to cut out the flowers from white paper and spray them with Glimmer Mist (aqua) or Smooch Spritz (purple). For the orange daisy I simply sponged the cut out flower with my ink and dauber.
I hope this gives you a few more ways to use these wonderful CottageCutz dies.

We invite you to ask questions and make comments on any of our posts. We're here to help!


Tuesday, June 22, 2010

I'm Listening....

My first thought when I saw this Pooch on Bed CottageCutz die was
"I'm Listening" and "Thinking of You". We all have times when we need to send this kind of a card to dear friend and what better way then with a cute dog.


Don't forget to the Edger dies, I think the Rick Rack is my favorite because I now have Rick Rack in any color I need and as much as I want!
I'll see you back here tomorrow for my Watch for it Wednesday post.
Have a great day everyone!


Monday, June 21, 2010

Sizzling Summer Cottage Cutz Release

Check out the newest Cottage Cutz Summer Release available for pre-order now!!!
Don't miss out on your chance to save now with pre-order pricing!!

Sunday, June 20, 2010

My Best Friend

My best friend Buddy, The Die. . Puppy in House, by Cottage Cutz. I wanted to create a mini scrapbook look in a frame. The main issues with framing a scrapbook layout is the page will not fit flat on the glass because of all the layers of paper and embellishments. I know it is hard to see, but if you notice how the plaid background does not match on the edge, that is because I cut a MAT in the same plaid background and mounted it on Scotch foam tape. This way the raised mat would create an even height on the outside of the layout. This would make the layout lay flat against the glass on the entire edge. This created a shadow box area in the center to work within. Remember this foam tape / mat frame trick for a layout page that may be causing the album to not close flat when closed. The frame helps the pages stack up better when using a lot of thick embellishments on a special page..

Now I was able to do the puppy and the house in several layers and overlaps of paper without there being an issue. Everything lays flat and does not press against the glass.

The other advantage to the mat frame, is the lettering is almost floating. The top of MY BEST is glued to the mat only on the tops of the letters and FRIEND is glued along the bottom of the letters to the mat. This allowed the letters to appear as if they are floating. So how do I solve the dot to the "i", I would have had to stick the dot of the i to the glass or glue it down on the background, than it would not have been floating. . . . notice the cute lettering trick. . . .use the negative of letters, so I used this for the I on the friend. I did not not want the I to stick out alone, so I picked the e from best at the top. To add additional dimension I mounted the red frame for the photo behind the mat, than mounted the frame above the mat on the top.


Thursday, June 17, 2010

Duck...Duck...Goose.

Well, in this case a Gander. ;)

My son had the part of the Gander in the Charlotte's Web play at his school. I knew this CottageCutz Goose w/ Bow die would work perfectly to accent my page.

This is the CottageCutz die I am showcasing today.


For my layout, I pop dotted my CottageCutz Goose w/ Bow die to really make him stand out on the page. This is one of the ideas from my 6/9/10 WFIW post, about how to add dimension to a project. To give him even more presence, I placed him on top of some bright colored circles.

This is a two page layout. I posted page two separately so you can see the CottageCutz Goose w/ Bow die close up. Below is the layout with both pages together.


If you are interested in the CottageCutz Goose w/ Bow die, it was released with the March/Easter dies.
Have a great Thursday!
Karen

Wednesday, June 16, 2010

Bones and Backgrounds

Again I am using a simple die. . . to create a patterned background. Here I cut a ton of Cottage Cutz Fish Skeletons and randomly applied the fish skeletons to my 2 1/2" lettering. Than cut all the overlap off, remember to cut as you go, that way you may have some fish parts to use in the smaller area's. I than attached the letter to the shadow cut to add a slight color contrast, I used two different white cardstock. This took the clean white look of the bones away.

Don't forget the negative of your dies cutz. Here I stacked up all the negatives and randomly . .unevenly cut around the edge to create a tile look.


Started applying them to a 12" strip of cardstock. . .WOW what a great border strip, I could not stop and before you knew it I had filled a 6" x 12" strip of paper. Randomly I used the real skeleton cutout.

Now I have two 5" x 6" panels to create a nice background for a card. I think this may make a nice background for a Father's day fishing card? What about hot pink cardstock with white skeletons and diamonds . . for the eyes of the fish. . wooo . . .FuFu cat card? Maybe as a wavy or school of fish across a scrapbook page?


Watch for it Wednesday # 65 Biscuits and Borders

Here I used the Biscuits to create a simple border.

Don't forget to break a few eggs and show a broken biscuit or two.

I Started with a rusty ink and sponged the edges on in a few area's of the biscuit

Than highlighted the biscuits with a dark brown ink and added the sparkle with a Sakura Sparkle gelly roll pen. Remember to swirl around in the general area that you want the sparkle, than tap a couple of times with your finger to spread the sparkle. Your swirl or pen lines will completely go away.

Here I started a frame with a base, than added the biscuits working around the frame to create a border of biscuits, again adding a few broke ones. I also used foam tape to raise several of the biscuits, this added a bit of dimension.


Today I wanted to used a small die from Cottage Cutz called Dog Biscuit. It seems to be a simple die, but can be used to create all sorts of primary items.

Tuesday, June 15, 2010

Happy Birthday "Cracker"

The first die I wanted from this Cats & Dogs release was the Dachshund. I have a niece that has a Dachshund named Cracker and they dress him up for Halloween and other occassions as well. He's such a part of their family. My sister loves this dog and wants to get her one too, so I had to have this die.
There have been a few questions on the CottageCutz Edger dies that I thought I'd show you again what these dies are like. I'm showing the Dog Edger in my example.
These come just like a regular die but in a 7" strip. Just place the paper over the top and cut out.

You get an actual cut out of the Edger. Then for those that have punch outs I simply pop out the pieces with my piercer and put some glue on the back and they're ready for my project.

Here's my card using the Dachshund, Dog Edger and the Dog Biscuit die.
I chose to use the dog with the collar, but there is a second die that comes with this that has clothes that you can dress up your Dachshund.


Saturday, June 12, 2010

Princess for a Day


I guess this is shaped card day, I decided to create a round card for the Cottage Cutz Kitty Princess Die. The pink background is 5" and a 5 1/2" for the white shadow. This seemed to fit the kitty just right. I highlighted the kitty in grey and added a little sparkle. The pillow was done in lavender with royal blue ink highlights. The background was embossed with random diamonds to match the diamond on the crown. I randomly sewed silver thread on the edge with purple and blue colored beads, leaving loops of silver thread and with random silver tails. The lettering was done with silver glitter stickers on white cardstock that was sponged in lavender and gray ink. Than the letters were oddly cut, and attached at different levels with foam dots.

A Birthday Wish


A B Wish for a friend this year has the cute Cottage Cutz Die Shih Tzu Peeker. I used a 7" B with shadow to make a card that is shaped on the front, but is regular shaped on the back. I thought having the pup peek through the hole in the B would create a cute dimension. I also added the flower from Cottage Cutz Puppy front & back Die to the peekers paws.

Friday, June 11, 2010

Milkshake anyone?

My daughter welcomed home a good friend home from college while another friend was about to depart on a two year mission for our church so they got together at a local restaurant and had some silly fun. I decided to do a layout to document this event and knew when I saw these pictures that the CottageCutz Parfait w/Strawberries was the die for this layout.

As our design team has mentioned many, many times these dies are so versatile with so many options within just one die itself. I made this die into a milkshake instead of a strawberry parfait. I wanted a straw so I simply cut a skinny piece of red cardstock and did the same for the sprinkles with different colors. Then I took my Glossy Accents and went over the cherry, straw and sprinkles to make them glossy.


Thursday, June 10, 2010

So Dog-Gone Cute!

Do you have a favorite die from the NEW CottageCutz Pet Release, but have no pets? No problem. There are many great ways to work the NEW CottageCutz Pet Release dies into everyday projects.

These are the CottageCutz dies I am showcasing today.


I used a couple of yesterdays WFIW post ideas on this layout. I used thin metal to cut the NEW CottageCutz Mini Name Tags, to create texture. I also used foam dots with the NEW CottageCutz Shih Tzu Peeker, to add dimension. These NEW CottageCutz Pet Release dies worked great as accents on my layout.

Because of the glare of the scan, I took a close up photo so you can see the page details.


Happy Thursday Everyone!
Karen

Wednesday, June 09, 2010

Watch for it Wednesday #64

Today I wanted to give you some fun ideas for adding texture and dimension to your projects using different types of crafting materials.

One of the easiest ways to add texture, is to cut your dies using textured cardstock. If you cut with plain cardstock and want to add texture, try using some embossing dies. Another quick idea, cut your dies using pattern paper.

There are a variety of texture adding materials out there with adhesive already applied. This makes it much easier to place your items on your project once you cut them. I played around with some of these materials; cork, thin metal, and chipboard, using my CottageCutz dies. The CottageCutz dies cut the different materials wonderfully. Some of the materials worked better if you cut them before you applied the foam to your CottageCutz dies. If you don't want to have to remove foam and re-apply foam, just run the dies through the machine two times. The cork and chipboard are thick enough to add some dimension to the project, as well as texture.

Pop dots or foam dots work great for giving dimension to your projects. They are relatively inexpensive and easy to use. Another idea, is to cut your dies twice and layer them. You can layer them using foam dots or slightly off center, this works great for creating dimension.

One last item I tried was craft foam. I got the craft foam sheets at my local craft store, the brand I used was Foamies, 2mm thick. I thought it would be neat to make my own CottageCutz Foam accents (aka Thickers). The CottageCutz dies cut the craft foam very easily. The craft foam comes in many different colors. This is a great material to use to add both texture and dimension.

Watch for my up coming posts this month. They will feature layouts that I have used some of the above ideas. Hopefully, this will inspire you to add some texture and dimension to your pages.

I hope you get some creative time today.
Karen

Tuesday, June 08, 2010

Hope Your Birthday is Purrrrfect!

Today's card feature this little miss Fancy Cat, the Fish Skeleton and Rick Rack Edger.

I had this paper in my stash and thought it would be perfect for this Fancy Cat die. I love how you have options with so many of these CottageCutz dies. I chose to make the cat without the hat and collar, but added a bow instead.
Meow!


Monday, June 07, 2010

Let Freedom Ring with Cottage Cutz

We are taking pre-orders now for this Limited Edition 4th of July Cottage Cutz Release. Don't miss out!!

Saturday, June 05, 2010

Bubbles of Love


So what you you name a new puppy who wanted to take a bath, no kid or puppy ever wants to take a bath. This card was made using the Cottage Cutz Puppy in Bathtub Die. I turned the shampoo bottle as if it had been spilled. The bone in the puppies hand is from the Cottage Cutz Schnauzer Die (off the collar). I cut extra bubbles to use as a border between the to colors on the background. the bubbles are also randomly on foam dots to add dimension. the bubbles were inked in blue, with jewels of different sizes and colors for the bubbles. Stickle than was added to the rest of the blue bubbles.

Just One More Time, and He's. . . . Gone!


If he chews one more thing! !. . . he's gone!. Now how many times have we heard that. This SORRY card is made with the Cottage Cutz Puppy Front & Back, along with the Mini Bone Biscuit Die. I really ruffed up the edges of the white paper and inked and smugged it a little to give a chewed look. The dangle on the card was made with waxed cord and I even took a few bites out of the biscuit.

Thursday, June 03, 2010

T'was the night before Christmas...

Christmas in June? I know, Christmas is months away, but I wanted to show you a way to use the NEW CottageCutz Pet Release dies even if you don't have pets.

These are the CottageCutz dies I am showcasing today.


For my layout, I used part of the words from The Night Before Christmas, as my long title. I used the NEW Mini CottageCutz mouse to accent the title. I also added one more mouse to my page because he was just so cute. The NEW CottageCutz Eyelet Edger was used to border my photo and also in a cluster above my title.

Have a favorite die from this NEW CottageCutz Pet Release, but don't have pets? There are many ways to work the new dies into everyday layouts or cards.

Happy Thursday Everyone!
Karen

Wednesday, June 02, 2010

Watch for it Wednesday #63 School's out for Summer!

It's that time of the year....again...when the kiddies are getting out of school.
Ours here in Utah got out last week.
One of my favorite layouts to do each year is the end of the year interview.
I usually get a picture of them on the last day of school, if they're in elementary school I get a picture of the party or autograph book they made.
If it's junior high or high school I get a picture with their yearbook.
I ask the following questions:
Who was your favorite teacher?
What was your favorite subject?
Who were your best friends this school year?
Who was your least favorite teacher?
Worst memory
Best memory etc.
You get the idea. It's fun for them to look back and see the changes they've made.
I think the most interesting thing I have found with my kids is that their favorite teacher is also their favorite class that year. What a difference a great teacher can make in the lives of our children.
As it says in my daughters yearbook H.A.G.S.
(Have a great summer)

Tuesday, June 01, 2010

A Little "Ruff"

The dog and cat dies have arrived! I'm featuring the CottageCutz Puppy Front & Back die.

I made my own saying for the card....can you tell???
I took my puppy and cut him out of cardstock, inked the edges and put him together. Then I added a little line detail with my skinny Zig pen.
I wanted a "real" dog nose so I put Glossy Accents on his black nose to make it look wet like a real dog.
We'll see ya back here for tomorrow's Watch for it Wednesday post!