Thursday, May 25, 2017

Prayers

Good Morning Scrapping Cottage Fans!

It is Pam sharing with you today. And I really excited to show you our new release Expressions Plus Dies!  Here is my Design Teammate to show you how wonderful these dies are!!
We gave you a small sample in the video of the 35 dies so I am including a picture of all the new release dies!

Now onto my design for today!  I am featuring one of the new word dies prayers mixed with the flower and stems dies!  This card is going to someone who is need of some support and cheer.


Here are my design steps:

1.  Using Wildflowers 1Wildflowers 2Wildflowers 5 and Garden Stems cut all of them out in white card stock
2.  Using dabbers ink the flowers and leaves with green, red and orange
3.  Cut out a 5 x 3 3/4 piece of white card stock and embossed with a musical notes embossing folder
4.  Use white card stock as your A2 base.  Cut out a piece of green card stock 5 1/4 x 4 and glue to the A2 white base.  Glue the note embossed white card stock to the green

5.  Glue all of the flowers down as shown
6. Cut out a 2 x 4 inch piece of vellum and gently tear the edges.  Attach to card front as shown the on white card stock cut out the word prayers.  Glue prayers to the vellum and add the pearls

This card is beautiful and easy!  It will bring cheer to someone who needs to have their spirits lifted!

Here are the Cottage Cutz Products used:


I hope you will check out all of the new Expressions Plus dies that are in our store!

Blessings
Pam


Wednesday, May 24, 2017

Two Ways to Make Shaker Cards Using Expressions Plus Dies (New Release)

Hi Everyone! It's Janet from SugarShine Designs here to help get you through Hump Day! If you feel like you could use some words of encouragement then you're in the right place. My project is a set of clean and simple cards featuring some of the 35 available dies in May's Expressions Plus word release. 


When I saw these dies, I immediately knew I would use the negative space of the words as windows for shaker boxes. In the video I show the traditional shaker box created by making a well for the shaker confetti with foam tape and covering it with an acetate window. The second method uses tulle to create both the window and the pocket to hold the shaker confetti. I'm a big fan of using tulle! It's much quicker, doesn't add additional bulk to your card and doesn't allow the shaker bits to gather at the bottom of the window. The size of the new Expressions Plus dies worked perfectly for either shaker method.

Check out the card set featuring the new Expressions Plus Dies by clicking below:


If you'd like to see more of the Expressions Plus die release, click on the YouTube video link below. See how these new dies compare to the older Expressions dies, ideas on using the two styles together and other thoughts to jump start your crafting imagination.


Thanks for spending some of your valuable time here at the Scrapping Cottage. Have a wonderful Wednesday!

-Janet

Dies used in this project:

Tuesday, May 23, 2017

Sweet dreams

Hi, Janja here!

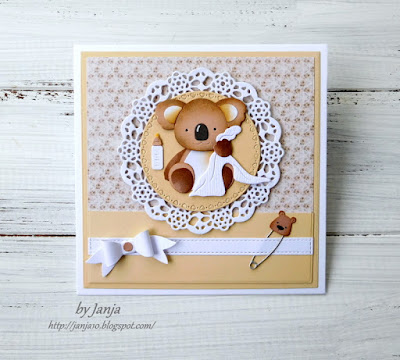
I have a lovely baby koala card, for you today. My card was made by using dies from the Baby release and the new Expressions plus release.


Supplies:
- CottageCutz dies: Baby Koala w/Blanket, Baby Diaper Pins, Baby Booties mini, Diaper mini, Sweet Phrase, Dream Phrase, Sweetheart Doilies, Tea Time Doily, Build-a-Bow, Stitched Wide Rectangle Frame Set, Stitched Wide Circle Drame Set, Circle Set
- white card base: 5.3 x 5.3" (13,5 x 13,5 cm), folded
- yellow cardstock: 5 x 5" (12,7 x 12,7 cm) and 4.76 x 1.57" (12,1 x 4 cm)
- patterned paper: 4.76 x 4.76" (12,1 x 12,1 cm)
- white and colored cardstock
- glue, double-sided adhesive tape, white fun foam

Koala's coat is in shades of ashen-gray, sometimes also in red-brown color. I gave it a brown color, combined with yellow background.
Cut out all the elements of baby koala and assemble them into a whole.


Find a patterned paper that you like, and choose a coordinating color of cardstock. Trim them to the appropriate size.


For the remaining elements use a white cardstock.


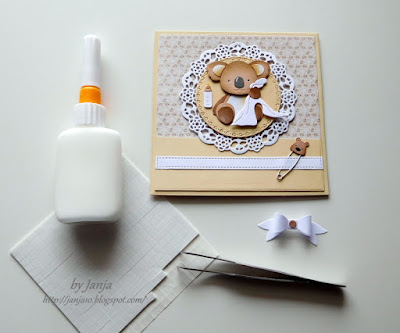
To keep the small hearts in openings, attach the self-adhesive foil on the backside. Glue both round cutouts, and add a circle from fun foam. If you prefer use self-adhesive foam tape.

Now it's time to assemble the card. 


Mount all the elements as shown on white card base. Use glue and self-adhesive foam pads.


For special occasions such as birth, it is nice to see a card that has also decorated the interior.


I added the small letter S at the end. I cut it out from the thanks phrase.
Attach a bow when the card is completed. 


Janet, our video artist has created a video showcasing some of the new Expressions Phrases. 


Have a lovely day!


Monday, May 22, 2017

Hello, Fishies!

Hi, Lois here with a clean and simple card today.  Clean and simple cards are not my usual style, but every once in a while I go outside my comfort zone.  Today is one of those days.  CottageCutz has a new line of Expressions Plus dies, which are very nice, script words.  My CAS card today has one of them.


Supplies used on this card are:

Heavyweight white cardstock 8 1/2" x 5 1/2", scored at 4 1/4"
Lightweight white cardstock for masking
Scraps of orange and blue cardstock for fish and sentiment
Sponge daubers
Fine-tip glue dispenser
Black marker
Foam pop dots
Ranger Distress ink - Tumbled Glass, Salty Ocean, Spiced Marmalade

Janet, our video artist, has created a video showcasing many of the Expressions Plus word dies.

https://www.youtube.com/watch?v=QSLcthpx5W0&feature=youtu.be


I cut and scored my heavyweight white cardstock and centered the mask piece slightly below center.  This mask was actually the negative piece left from when I had cut a circle for a previous card.  I anchored it with a couple of Post-It notes and then sponged on  the Tumbled Glass ink using a sponge dauber.


Using the same sponge dauber, I added some areas of Salty Ocean ink to give some depth to the water area.  As you can see in the photo, after inking up the dauber I sponged off a bit of the color onto the Post-It note.  Better to have to add color to the circle area than to try to remove it!


Then I cut my fish and sentiment from the scraps of orange and blue cardstock.


Once again using the sponge daubers, I added some texture to the two fish around their fins and gills.


Using the fine-tip glue applicator, I carefully added glue to the back of the sentiment.


Similarly, I added glue to the back of the blue fish.  I also adhered a small foam pop-dot on the back one of the fins. 


I repeated  the process on the orange fish and adhered both of the fish and the sentiment to the card.  I added a few drops of glue to make the bubbles coming from their mouths and drew in their eyes with a black marker.


This close up shows how the fins with the foam dots stand out from the card.


Here again is my card, which I thoroughly enjoyed creating!


CottageCutz dies used on this card are;


http://www.scrappingcottage.com/search.aspx?find=double+stitched+circle

http://www.scrappingcottage.com/cottagecutzexpressionsplushellophrase.aspx

http://www.scrappingcottage.com/cottagecutzhappyfish1elites.aspx

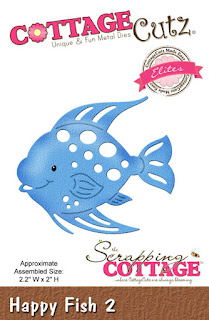
http://www.scrappingcottage.com/cottagecutzhappyfish2elites.aspx


I would invite you to step outside your comfort zone and create a different kind of card today.